| Prep Time | Cook Time | Servings | Cuisine | Difficulty |
|---|---|---|---|---|
| 10 minutes | 0 minutes | About 1 cup (8 servings) | Mediterranean / American fusion | Easy |
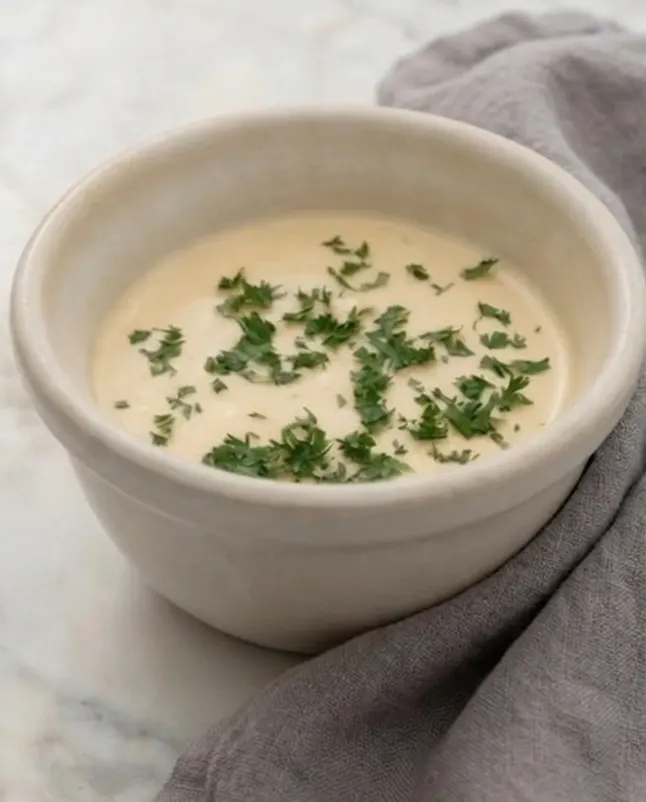
Table of Contents
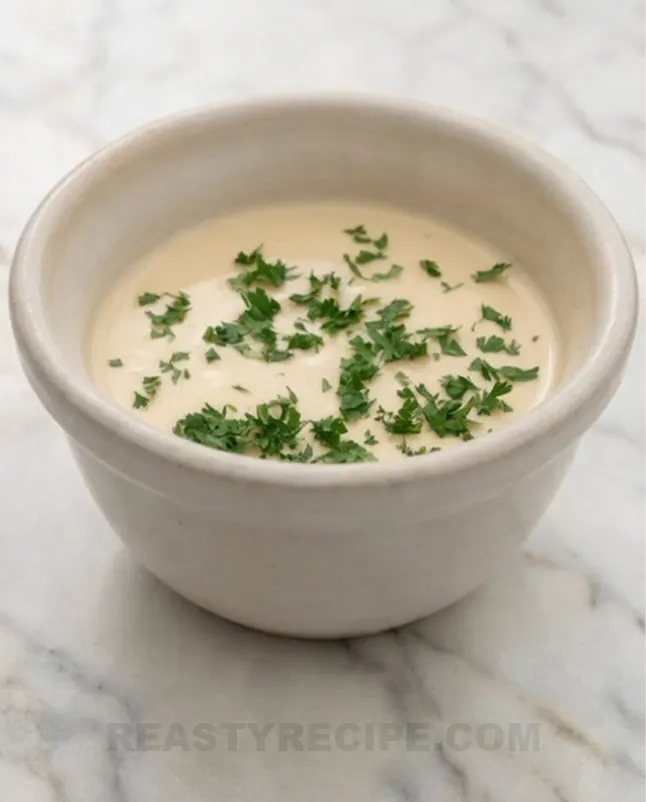
Hello friends, Chef Steve here. Today we are diving into one of my favorite condiments to make at home: Garlic aioli. This creamy, garlicky sauce can transform ordinary dishes into something memorable. Whether you smear it on a grilled chicken sandwich, serve it with roasted veggies, or use it as a dip for golden fries, a good garlic aioli delivers layers of flavor without fuss. This garlic aioli recipe will guide you step by step through making the best garlic aioli at home, plus show easy variations like roasted garlic aioli and a vegan garlic aioli option.
Why You’ll Love It
Homemade garlic aioli beats store-bought jars in freshness and flavor. You control the garlic intensity, the creaminess, and the salt level. It is ridiculously versatile, elevating grilled and roasted dishes, seafood, and simple veggie platters. This easy garlic aioli is creamy yet bright, balancing raw garlic punch with acid and a velvety texture. If you love garlic and crave a rich condiment that pairs with everything, this is your new secret weapon.
History and Origin of Garlic aioli
Aioli traces back to the Mediterranean coastline, especially Provence and Catalonia. The name comes from the Provencal and Catalan words for garlic and oil. Traditionally, classic aioli was simply garlic pounded with olive oil until emulsified. Over time, recipes evolved and home cooks added egg yolk or mustard to stabilize the emulsion and make the sauce creamier and easier to achieve. Today, variations like garlic and herb aioli, roasted garlic aioli, and vegan garlic aioli expand the classic form. American kitchens embraced aioli as a flavor-forward spread, which is why you will often find it paired with grilled, roasted, or smoked proteins on ReastyRecipe.com.
Ingredients for making Garlic aioli

Here is what you will need for a classic, creamy garlic aioli. I include notes for substitutions and tips on ingredient quality so you get consistent results.
- 1 large egg yolk at room temperature, helps emulsify. Use pasteurized eggs if you are concerned about raw eggs.
- 1 cup neutral oil such as light olive oil, avocado oil, or grapeseed oil. For more pronounced flavor use half extra virgin olive oil and half neutral oil.
- 3 garlic cloves finely minced or grated. For a milder garlic flavor use 1 to 2 cloves. For roasted garlic aioli swap with roasted garlic cloves.
- 1 tablespoon fresh lemon juice or white wine vinegar alternative like white wine vinegar is not allowed here; use lemon juice instead. Acid brightens the aioli.
- 1 teaspoon Dijon mustard optional, but it stabilizes the emulsion and adds subtle tang.
- Salt to taste, start with 1/2 teaspoon and adjust.
- Freshly ground black pepper to taste.
- Optional: 1 to 2 teaspoons water to thin if necessary.
- Optional herbs like chopped parsley, chives, or a pinch of dried oregano for garlic and herb aioli.
- For vegan garlic aioli: substitute egg yolk with 1/4 cup aquafaba or 1/2 cup silken tofu and proceed with oil and lemon juice.
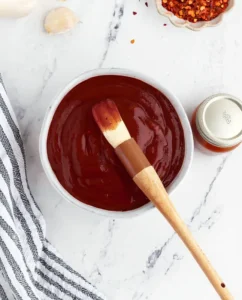
Step-by-Step Instructions
Below is a clear, foolproof method to make silky garlic aioli. I include both whisking by hand and blender/food processor methods.
Method 1: Classic Whisked Aioli (Traditional)
- Start with all ingredients at room temperature. Put the egg yolk, minced garlic, Dijon mustard, and lemon juice in a medium mixing bowl.
- Whisk the yolk mixture vigorously to combine. If using raw egg concerns you, use a pasteurized yolk or choose the blender method with a cooked or vegan base.
- Very slowly, begin adding oil a few drops at a time while whisking continuously. This slow start is the crucial step to forming a stable emulsion. As the emulsion forms, you can add oil in a thin, steady stream.
- Whisk until the aioli thickens to a mayonnaise-like consistency. If it becomes too thick, whisk in 1 to 2 teaspoons of water or lemon juice to adjust.
- Season with salt and pepper and taste. Add additional lemon juice if you prefer more brightness.
Method 2: Food Processor or Blender (Quick, Reliable)
- Place the egg yolk, garlic, mustard, and lemon juice in the bowl of a food processor or the cup of an immersion blender.
- With the machine running, drizzle the oil slowly until the mixture emulsifies and thickens. A blender or processor is more forgiving and faster than whisking by hand.
- Taste and season. If using an immersion blender, you can start with the egg and garlic at the bottom and slowly lift the head as it emulsifies.
Method 3: Vegan Garlic Aioli
- Combine aquafaba or silken tofu with lemon juice, garlic, and mustard in a blender.
- With the blender running, stream in oil until the mixture thickens. Adjust salt and acid to taste. For a richer mouthfeel, add a teaspoon of olive oil late in the blending process.
Troubleshooting an Aioli that Breaks
If your aioli separates or breaks, do not panic. Start with a fresh egg yolk in a clean bowl and slowly whisk the broken aioli into the new yolk a little at a time. The fresh yolk will rebind the oil. Alternatively, add a teaspoon of boiling water while whisking to help bring it back together.
Chef Tips from Steve
- Use room temperature ingredients for a stable emulsion. Cold ingredients can make emulsification difficult.
- Go slow with the oil at the start. The first few drops determine success.
- Choose your oil wisely. Neutral oils make a mellower aioli. Mixing some extra virgin olive oil adds flavor but keep it to half or less to avoid bitterness.
- Adjust garlic intensity to your taste. Raw garlic is potent. For a milder, sweeter garlic aioli, roast the garlic first.
- Make ahead and chill. Aioli develops flavor after a few hours in the fridge, but bring it to room temperature before serving for best texture and aroma.
- For a silky finish strain the aioli through a fine mesh if it has any small lumps of garlic you do not want to notice.
- Keep it safe. Because traditional aioli can contain raw egg yolk, store in the fridge and consume within 3 to 4 days. Use pasteurized eggs to minimize risk.
- Experiment with acid. Lemon juice adds brightness; a touch more enhances flavor without making it sour.
- For more stability add a teaspoon of Dijon mustard to help anchor the emulsion.
Pairing Suggestions
Garlic aioli is a chameleon. Here are some of my favorite pairings that will make your next meal sing.
- Sandwiches and Burgers: Spread garlic aioli on grilled chicken sandwiches, beef burgers, or veggie patties for instant flavor lift.
- Seafood: Serve with grilled shrimp, roasted salmon, or as a dip for fried calamari. The creaminess complements the briny, charred notes.
- Vegetables: Roasted or raw vegetables like carrots, roasted Brussels sprouts, and asparagus pair wonderfully with garlic aioli.
- Fries and Chips: Use as a dip for fries, sweet potato wedges, or plantain chips. It is a classic fry companion.
- Grilled Meats: A spoonful alongside grilled steak or roasted chicken adds richness and bright acidity.
- Breakfast: Dollop on breakfast sandwiches or roasted potatoes for a savory kick.
Common Mistakes
A few small mistakes can take your garlic aioli from sublime to sad. Avoid these common missteps.
- Adding oil too quickly before an emulsion forms. This causes the aioli to break.
- Using strong extra virgin olive oil as sole oil. The intense flavor can make the aioli bitter. Balance it with neutral oil if you like olive oil flavor.
- Not seasoning properly. Aioli can taste flat without enough salt or acid. Taste as you go.
- Using too much raw garlic for sensitive palates. Start with less and increase after tasting.
- Serving straight from the fridge. Cold aioli is firmer and less aromatic. Let it sit a few minutes at room temperature.
- Over-processing when using a blender. If you heat the aioli by blending too many minutes, it may separate or lose fresh garlic brightness.
Variations
Once you have the base garlic aioli down, the world is your oyster. Here are popular variations that are easy to make.
- Roasted Garlic aioli: Roast a head of garlic until soft and caramelized, then mash the cloves into the aioli for a deeper, mellow garlic flavor.
- Garlic and Herb aioli: Stir in finely chopped parsley, chives, or tarragon for a fresh herb lift.
- Spicy aioli – Add a teaspoon of smoked paprika, a dash of cayenne, or Sriracha for heat.
- Vegan garlic aioli: Use aquafaba or silken tofu as your base to make a vegan garlic aioli that still has a creamy texture.
- Citrus garlic aioli: Add grated lemon zest or a splash of lime juice for bright citrus notes perfect for seafood.
- Smoky chipotle aioli: Fold in a touch of chipotle in adobo for a smoky, spicy spread great with grilled meats and fries.
Storage Tips
Storing your garlic aioli correctly will keep it fresh and safe.
- Refrigerate promptly in an airtight container. Keep aioli chilled at all times.
- Use within 3 to 4 days when made with raw egg. For vegan garlic aioli, it may last up to 5 days.
- Do not leave at room temperature for extended periods. If you serve aioli at a buffet, swap out the bowl every hour to ensure safety.
- Freeze? Not recommended for mayonnaise-style emulsions since freezing breaks the texture. Make a new batch for best results.
- To refresh slightly thickened aioli, whisk in a teaspoon of warm water or a squeeze of lemon juice.
Nutrition
The nutrition values below are estimates per tablespoon serving and will vary based on exact ingredients and oil choices. Values are approximate.
| Serving Size: | 1 Tbsp (14g) |
| Cholesterol: | 10 mg |
| Total Sugars: | 0 g |
| Calories: | 100 kcal |
| Sodium: | 90 mg |
| Protein: | 0.1 g |
| Total Fat: | 11 g |
| Total Carbohydrates: | 0.2 g |
| Vitamin C: | 0.2 mg |
| Saturated Fat: | 1.5 g |
| Dietary Fiber: | 0 g |
| Iron: | 0.1 mg |
Final Thoughts from Chef Steve
Making garlic aioli at home is one of those small projects that pays major dividends. It is quick, rewarding, and highly customisable. Whether you stick to this easy garlic aioli base, try a roasted garlic aioli for sweeter, milder notes, or switch to a vegan garlic aioli for dietary needs, you will find that homemade aioli takes everyday dishes to a higher level. Keep practicing the emulsion technique and flavor balancing. Once you nail it, your fridge will have a multi-use condiment that makes weeknight dinners feel special. Happy cooking, and don’t be shy with the garlic if you love bold flavor.
FAQs
Q: What is the difference between aioli and mayonnaise?
A: Traditional aioli is garlic and oil emulsified, often without egg. Modern garlic aioli recipes commonly include an egg yolk or mustard to stabilize the emulsion, which makes aioli very similar to mayonnaise but with pronounced garlic and citrus notes.
Q: Can I make garlic aioli without raw egg?
A: Yes. Use pasteurized egg yolks, or make a vegan garlic aioli with aquafaba or silken tofu. Another option is to use store-bought mayonnaise as a base and fold in garlic, lemon, and herbs for a simple shortcut.
Q: How long does homemade garlic aioli last?
A: When made with raw egg, keep refrigerated and consume within 3 to 4 days. Vegan versions can last a bit longer, typically up to 5 days in the fridge. Always store in an airtight container.
Q: Why did my aioli break and how can I fix it?
A: Breaking usually happens when oil is added too quickly or if ingredients are too cold. Fix it by starting with a fresh egg yolk in a clean bowl and whisking the broken aioli slowly into the new yolk, or add a teaspoon of warm water while whisking to help re-emulsify.
Q: Can I roast the garlic for a milder flavor?
A: Absolutely. Roasted garlic is sweeter and milder. Squeeze the soft roasted cloves into the aioli and blend or whisk until incorporated. Roasted garlic aioli is fantastic with roasted vegetables and grilled seafood.
Q: What oils work best for garlic aioli?
A: Neutral oils like avocado, grapeseed, or light olive oil create a mellow base. You can use up to half extra virgin olive oil for flavor, but using only robust extra virgin olive oil may taste bitter. Mixing is the best approach.
Q: Is garlic aioli healthy?
A: Garlic aioli is high in fat because it is oil based. The fats can be healthy if you choose heart-healthy oils like olive or avocado oil. Use it as a flavorful accent rather than a large portion to keep things balanced.
Q: Can I make garlic aioli in advance?
A: Yes. Flavor often improves after a few hours in the fridge. Make it up to 3 days ahead if using raw eggs. Bring to room temperature before serving for best texture and aroma.
Q: How do I make garlic aioli thinner or thicker?
A: To thin, whisk in a small amount of water or lemon juice. To thicken, whisk in a bit more oil slowly or chill briefly to firm it up.
Q: Are there low-fat alternatives?
A: Vegan garlic aioli made with silken tofu or a low-fat yogurt-based garlic sauce can reduce fat content while retaining creaminess. These are not classic aioli but are tasty lower-fat options.
Q: Can I use powdered garlic?
A: Fresh garlic is preferred for vibrant flavor. Powdered garlic can be used in a pinch but will lack the fresh bite and complexity of fresh or roasted garlic.
Q: What herbs go best in garlic and herb aioli?
A: Parsley, chives, tarragon, and dill are excellent choices. Use fresh herbs chopped finely and add them at the end so they stay bright.
Q: How should I serve garlic aioli at a party?
A: Place aioli in a small bowl, sprinkle finely chopped herbs or paprika on top, and surround with vegetable sticks, fries, or crostini. Keep the bowl on ice for long service periods to maintain safety.
Thanks for sharing. I read many of your blog posts, cool, your blog is very good.
Thank you! I’m really glad you’re enjoying the blog and the posts.